.png)


Google Search Console is an essential tool for website owners and digital marketers, providing valuable insights into how Googlebot interacts with your site. Sometimes, you may need to share access to your Google Search Console account with team members, SEO experts, or other collaborators to monitor and optimize your website's performance in search results. In this article, we will walk you through the step-by-step process of granting access to your Google Search Console account.
The Steps To Giving Access To Google Search Console
Step 1: Sign in to Google Search Console
Start by signing in to your Google Search Console account using your Google credentials. Visit https://search.google.com/search-console and log in if you're not already.
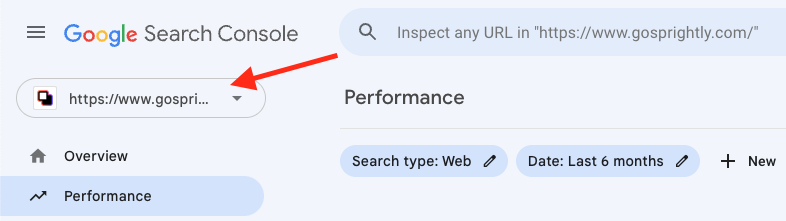
Step 2: Select the Property
Once you're logged in, select the website property that you want to share access to. If you have multiple properties, make sure you choose the correct one from the property list.
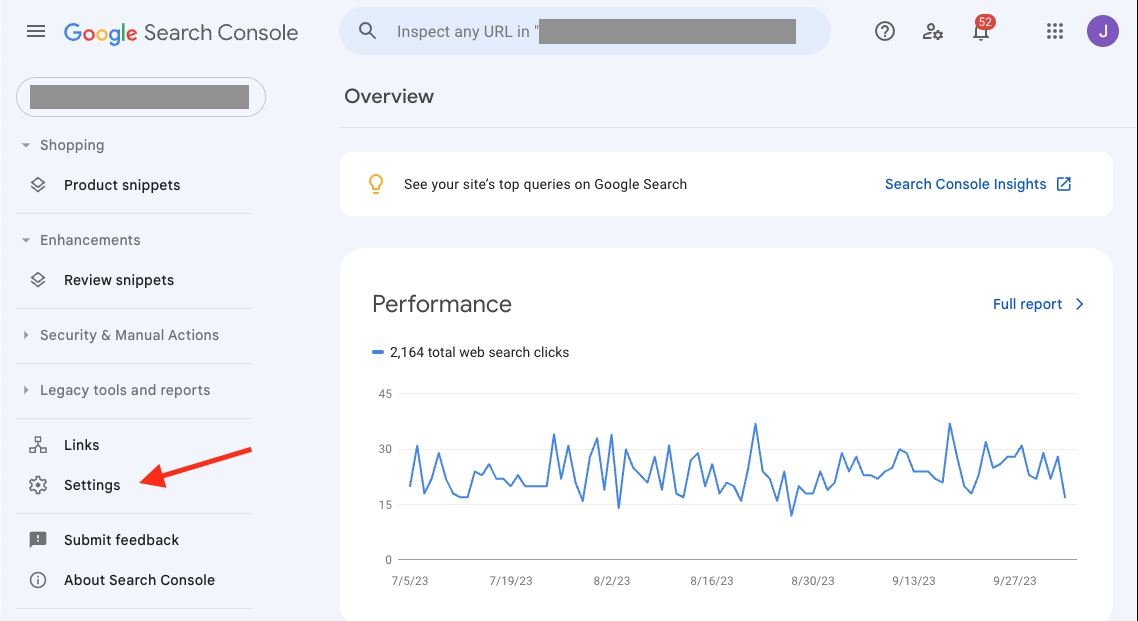
Step 3: Access Property Settings
On the left-hand side of the dashboard, click on the gear icon labeled "Settings" to access the property settings.
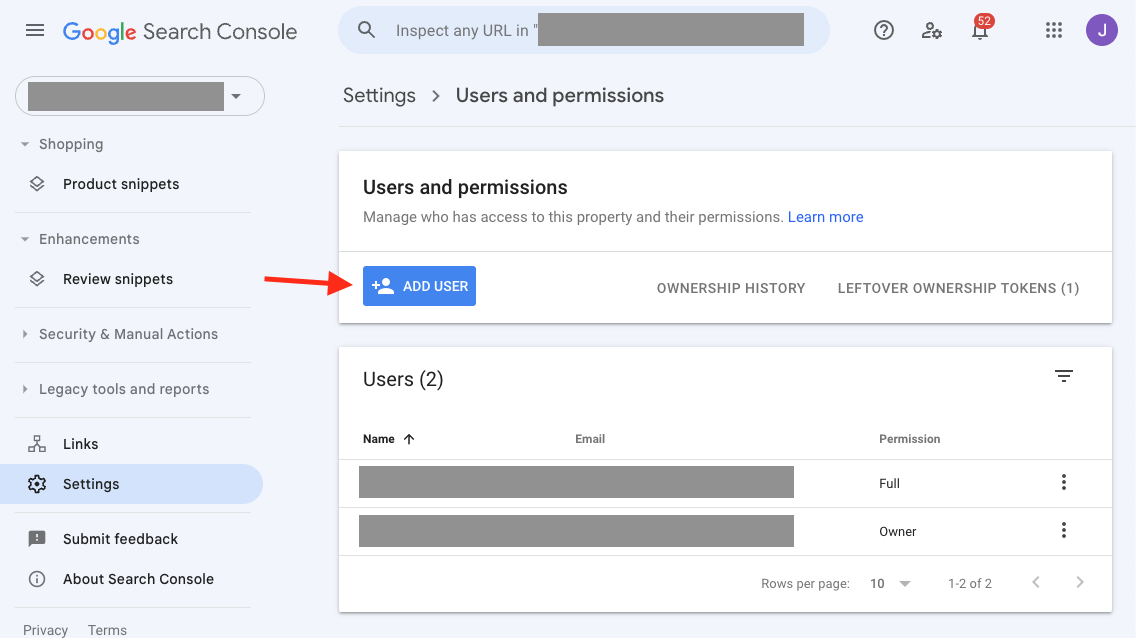
Step 4: Users and Permissions
In the property settings, click on the "Users and permissions" tab. This is where you'll manage access to your Google Search Console property.

Step 5: Add a New User
To grant access to another person, click the "+ ADD USER" button.
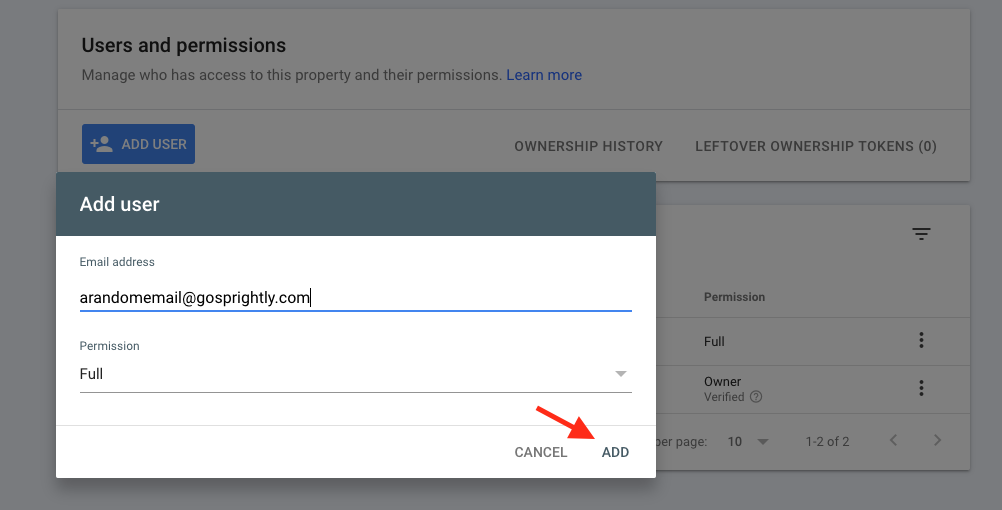
Step 6: Enter Email Address
Enter the email address of the user you want to grant access to in the provided field. Make sure you enter the correct email address.
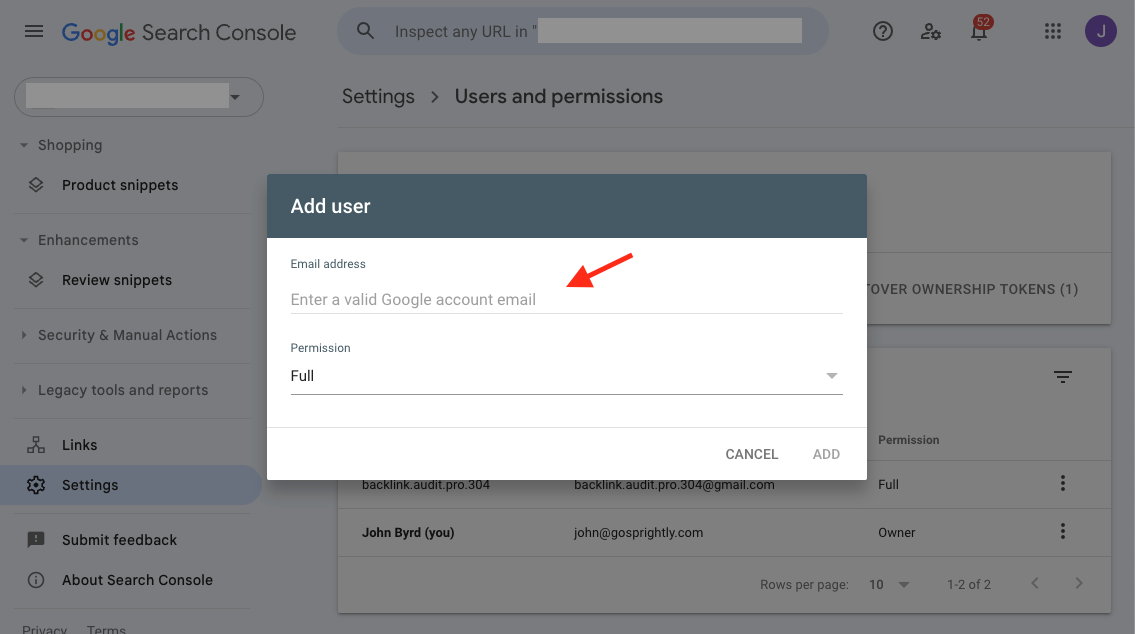
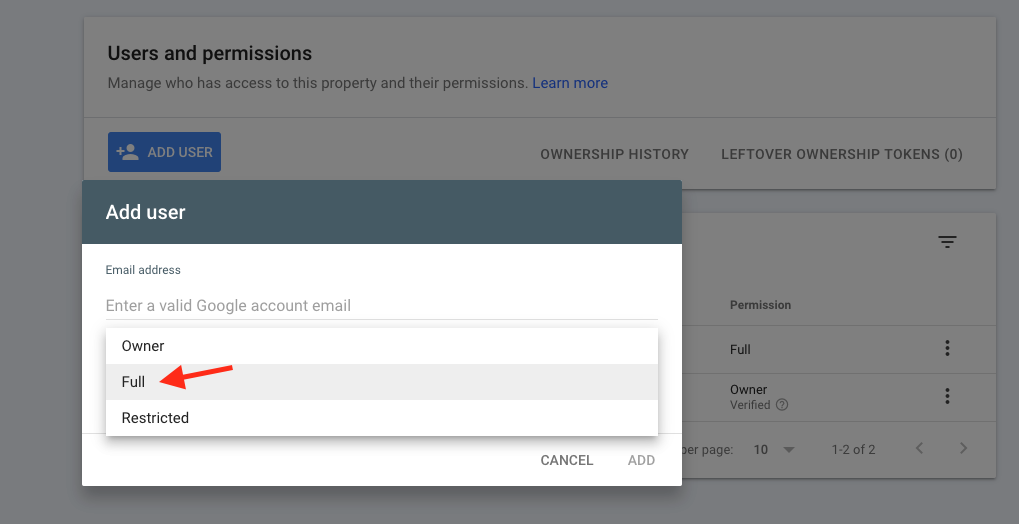
Step 7: Choose Permission Level
You can specify the level of access you want to grant to the user. Google Search Console offers the following permission levels:
- Full (Complete control over all aspects of the property)
- Restricted (Access to most features but with some restrictions)
- View (Read-only access to view data)
Select the appropriate permission level based on the user's role and responsibilities. (with Sprightly Marketing you will want to give us full access)
Step 8: Notify Users
After specifying the email address and permission level, click the "Add" button. Google Search Console will send an email invitation to the user. They will need to accept the invitation to gain access.
Invitation Sent
Once the user accepts the invitation, they will have access to your Google Search Console property with the specified permissions. They can log in to their own Google account and select the shared property from their dashboard.
Review and Manage Access
You can review and manage user access at any time by returning to the "Users and permissions" tab in the property settings. From there, you can add or remove users, adjust their permissions, or revoke access as needed.
Sharing access to your Google Search Console property is a crucial step in collaborating effectively with SEO experts and team members. By following these steps, you can ensure that the right people have the appropriate level of access to your website's search performance data, enabling better optimization and monitoring of your site's visibility in search results.
Ready to Elevate Your Business?